Overview
This is the third variant in this series, after Xvfb for X11 AUTs and Sway for Wayland AUTs . Instead of giving the container its own virtual display, it connects the container directly to your machine's real display. There's no Xvfb, no Sway and no VNC. The Squish IDE and the AUT appear as normal windows on your desktop, as if Squish were installed locally.
The Xvfb and Sway variants are built for headless use, such as CI pipelines. This one is built for interactive, local development, where you want to see and use the IDE and the AUT directly without installing Squish on your machine. It is also the only variant that installs and runs the full Squish IDE inside the container.
Note: This project is a boilerplate, a baseline to adapt to your AUT, licensing and environment, not a production-ready solution. Review all scripts and configuration before use.
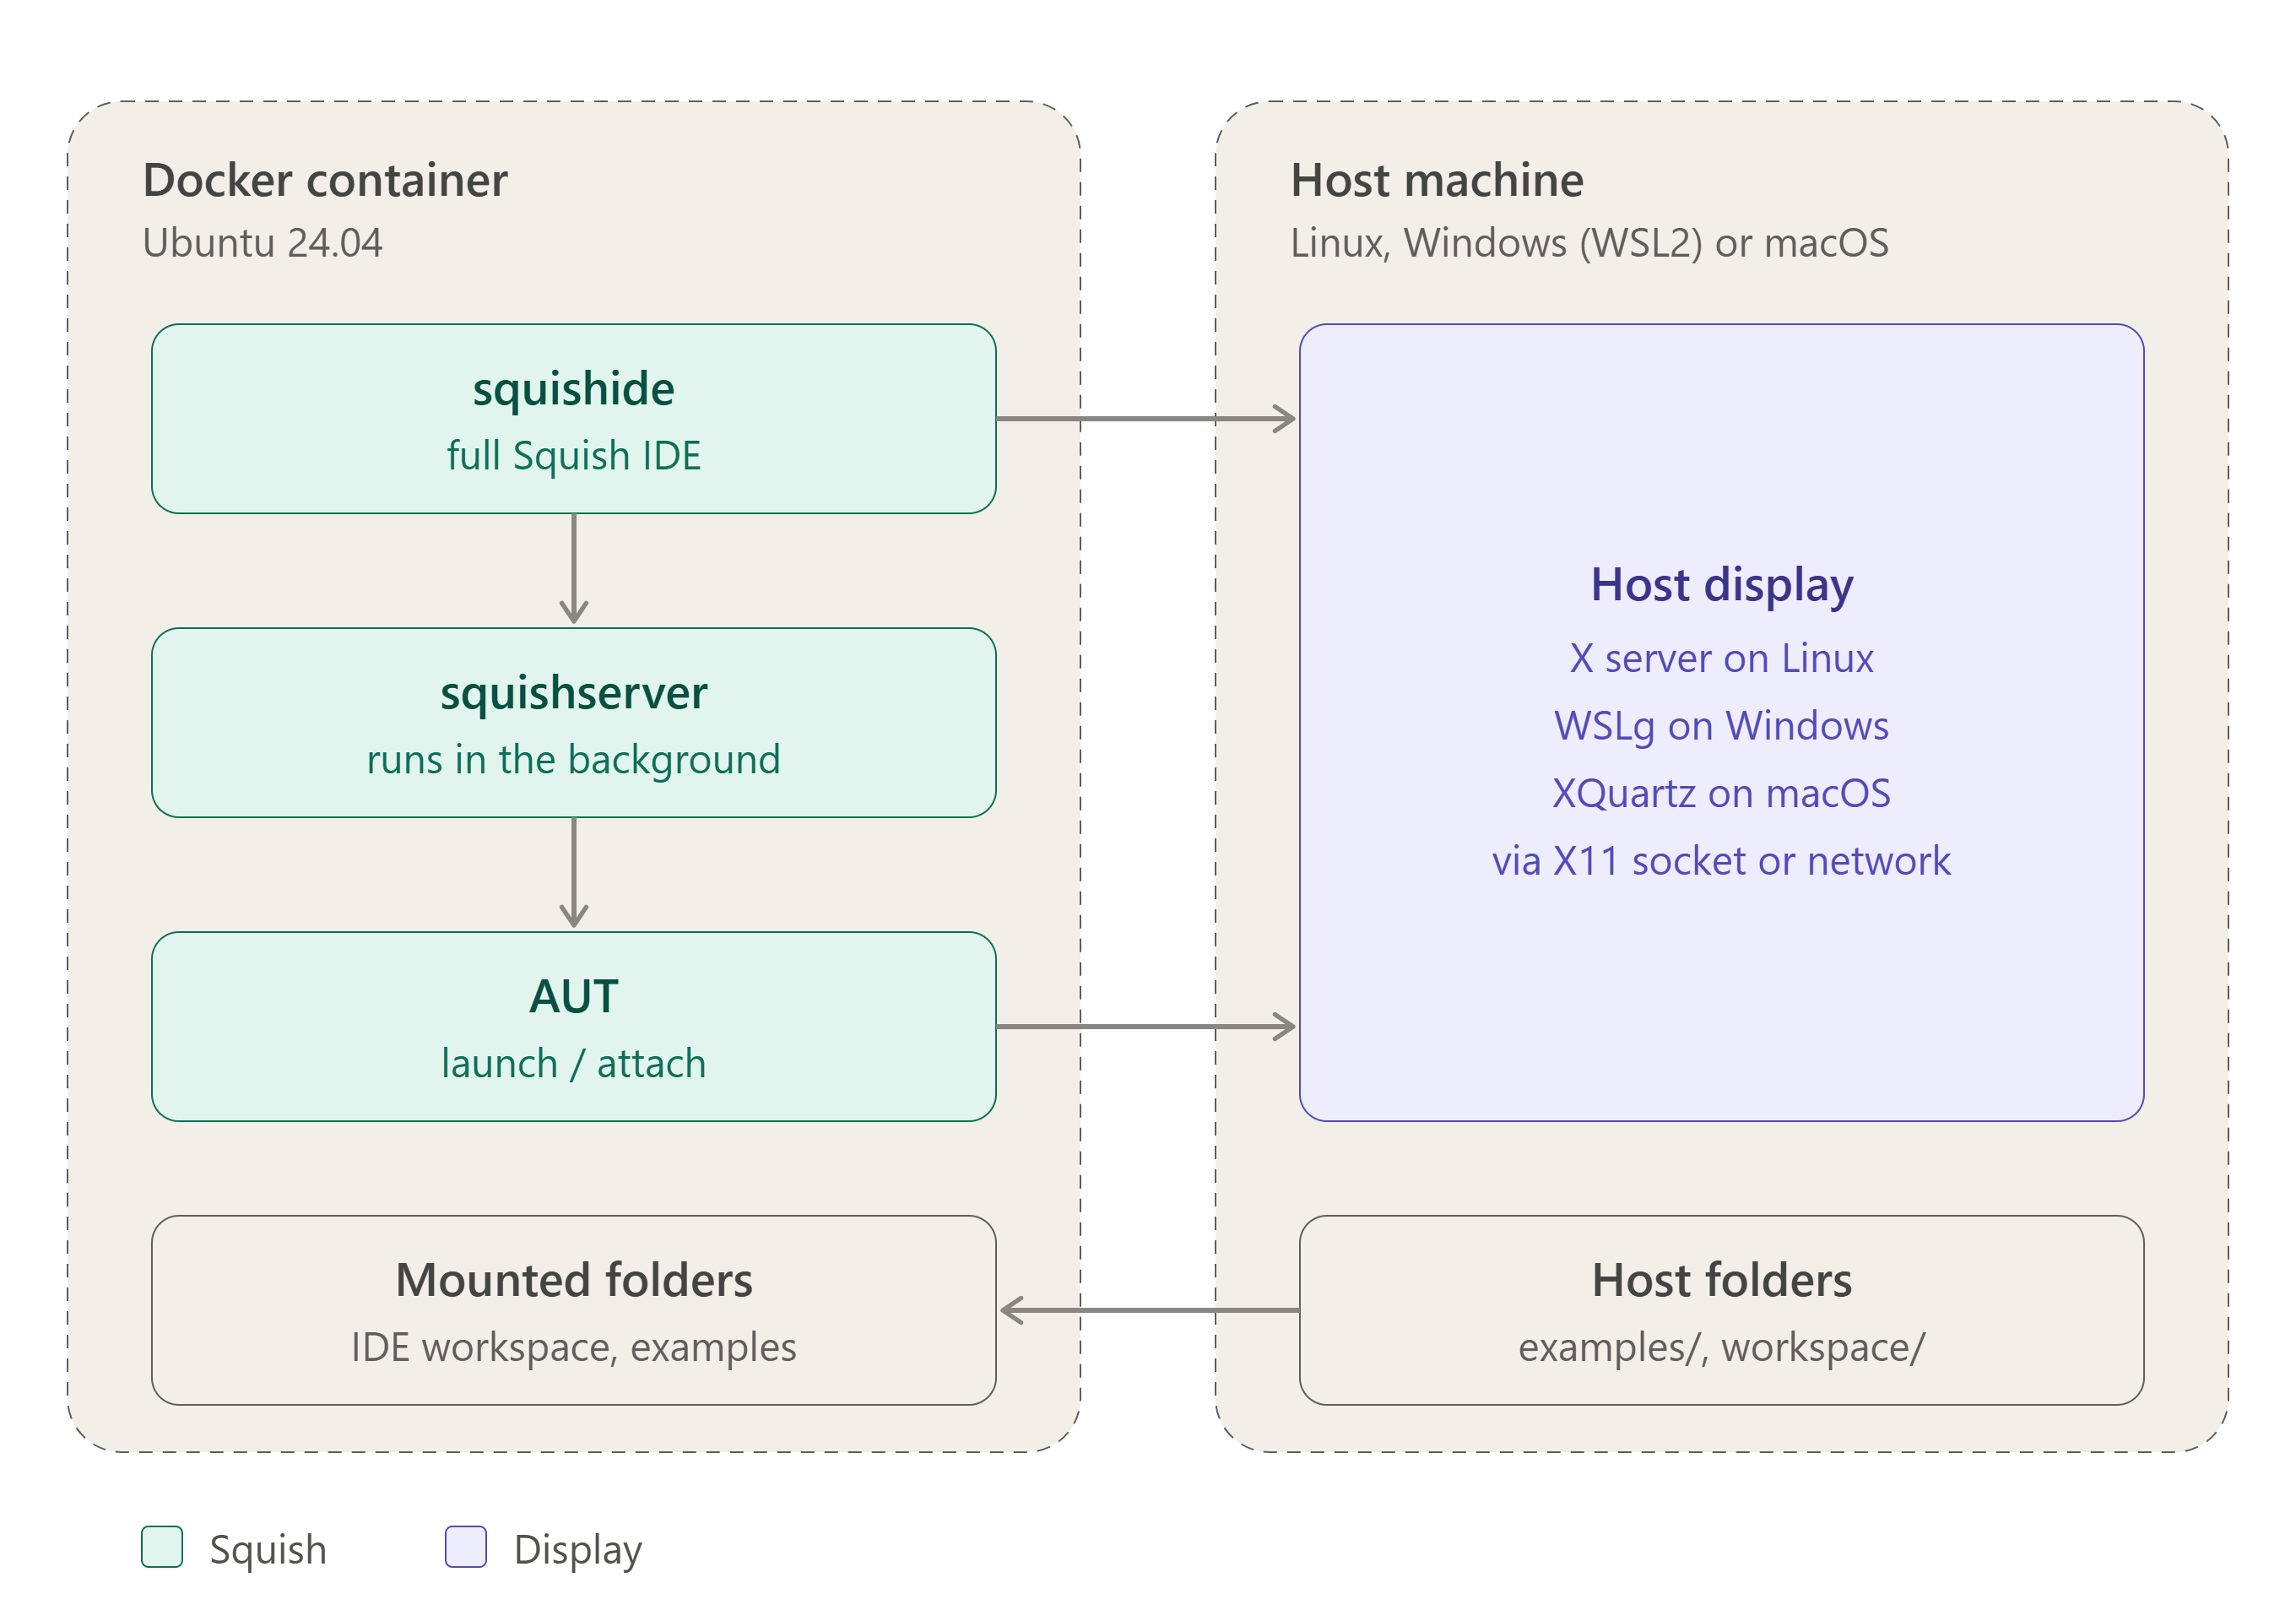
Figure 1: The Squish IDE and the AUT run inside the container but draw their windows on the host display. On Linux and Windows, this goes through the mounted X11 socket (an X server on Linux, WSLg on Windows). On macOS, it goes over the network to XQuartz. The host examples and workspace folders are bind-mounted into the container.
Windows Users: Docker Desktop Must Use the WSL2 Backend
On Windows, this setup only works with Docker Desktop's WSL2-based engine (see Install Docker Desktop on Windows | Docker Docs), not the older Hyper-V backend. Make sure WSL2 is selected when installing. The setup relies on WSLg, the X11/Wayland support built into WSL2, to bridge the container's display to your Windows desktop. Without it, the container can't reach your screen.
Prerequisites
- Docker Engine on Linux, or Docker Desktop with the WSL2 backend on Windows.
- A Squish Linux installer
.runfile (default:squish-9.2.2-qt611x-linux64.run), placed alongside the Dockerfile. - Network access to a Qt license server.
- On macOS, the host needs XQuartz with network connections enabled (in XQuartz, Settings > Security > "Allow connections from network clients") to use the host display.
Project Files
Download: docker_squish_ubuntu24_sway.zip
- Dockerfile: builds the image on Ubuntu 24.04 with the X11/XCB and GTK3 libraries that the Squish IDE (Eclipse/SWT) and Qt need.
- install_squish.sh: unattended Squish install. Unlike the headless variants, it includes the IDE.
- start.sh: the entrypoint. Exits if
DISPLAYisn't set, starts squishserver, registers the AUT according toAUT_MODE, then launchessquishidewithexamples/suite_pyopen if that folder exists. - docker-compose.yml: defines
windowsandlinuxprofiles, since each platform reaches the host display differently. - examples/ and workspace/: bind-mount targets for test suites and the IDE workspace.
Configure the Dockerfile
Before building, set these two values in the Dockerfile:
ENV QT_LICENSE_SERVER=<qls_server_url>
ENV SQUISH_INSTALLER=squish-9.2.2-qt68x-linux64.run
If you're using a legacy FLS, you can adjust the install_squish.sh script by changing: license-server-qt=${QT_LICENSE_SERVER} telemetry=0 to license-server-floating=<host:port>.
Build
docker build -t squish-addressbook-hostdisplay:latest .
The Squish installer must be alongside the Dockerfile. Compose builds the image automatically as part of up.
On Apple Silicon Macs, build with --platform linux/amd64, because this image supports amd64 only.
Run
Windows uses WSLg's X11 socket and explicit port mappings, because Docker Desktop doesn't support --network host. Linux uses --network host plus an XAUTHORITY cookie, so you don't need to loosen X11 access with xhost. macOS connects to XQuartz over the network, so it uses DISPLAY=host.docker.internal:0 instead of a mounted socket.
With Compose (Windows and Linux): use the profile that matches your OS. On macOS, use docker run.
# Windows (WSL2 + WSLg)
docker compose --profile windows up -d

# Linux
docker compose --profile linux up -d

# Stop (use the same profile you started with)
docker compose --profile windows down
docker compose --profile linux down
With docker run in a Windows WSL2 terminal:
docker run --rm -it \
  -e DISPLAY="$DISPLAY" \
  -v /tmp/.X11-unix:/tmp/.X11-unix:ro \
  squish-addressbook-hostdisplay:latest
With docker run on Linux:
docker run --rm -it \
  --network host \
  -e DISPLAY="$DISPLAY" \
  -e XAUTHORITY=/tmp/.Xauthority \
  -v /tmp/.X11-unix:/tmp/.X11-unix:ro \
  -v "${XAUTHORITY:-$HOME/.Xauthority}:/tmp/.Xauthority:ro" \
  squish-addressbook-hostdisplay:latest
With --network host, no -p mappings are needed, but the X11 socket must still be mounted. On Windows and Linux, start.sh exits if DISPLAY isn't passed in.
With docker run on macOS:
docker run --rm -it \
  --platform linux/amd64 \
  -p 4322:4322 \
  -e DISPLAY=host.docker.internal:0 \
  -e QT_QPA_PLATFORM=xcb \
  squish-addressbook-hostdisplay:latest
On macOS, allow network connections in XQuartz, or run xhost + 127.0.0.1 in an XQuartz terminal. The xhost option loosens X access for local connections, so use it only on a trusted machine.
Running Tests
Because start.sh launches the Squish IDE, you run tests as you would with a local install: open a suite (or let the default suite_py load if it's mounted), then run or edit tests from the IDE. The AUT appears as a real window on your desktop.
Use Cases
This variant is for situations where a person is driving, not a pipeline: writing and debugging tests in the full IDE, onboarding testers on Windows, Linux or macOS with one identical Squish + IDE environment (only Docker required), and manual exploratory testing where everyone runs the same Squish/Qt version.
Notes and Trade-offs
- Object picking and highlighting don't work on Windows WSL2.
- Windows needs the WSL2 backend. The Hyper-V backend has no WSLg X11 passthrough.
- On Apple Silicon, the amd64 image runs under emulation, so expect it to be slower than on native amd64 hardware.
- Closing the Squish IDE doesn't stop the container. squishserver keeps running. Use
docker compose down(ordocker stop) to end the session. - The image is larger than it needs to be, by design. The installer is copied in, run and deleted in one
RUNstep, but the earlierCOPYalready stored it in an image layer. This keeps the Dockerfile simple and lets each customer use their own installer version, instead of pinning one through a multi-stage build.